How To: Build A Web Page

How to use the new SMC Website to Login, Create, Publish and Manage your own Program Page or Flex Page
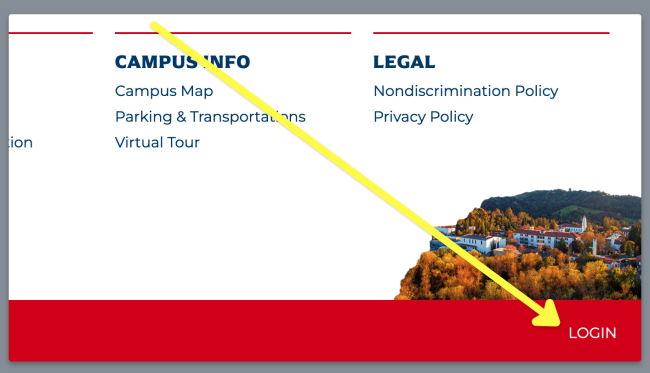
Step 1: Scroll the bottom or footer of the website.
Step 2: Select the login link on the bottom right.
Step 3: Enter your information on the next page using the Campus Authentication Portal "OneLogin."
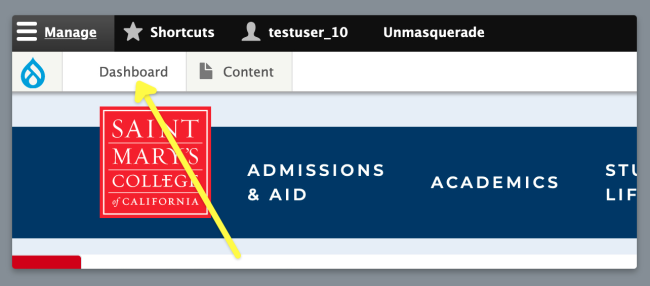
Step 1: Select "Dashboard" in the top left corner of the page, above the main website navigation.
Step 2: Use the list of content found in your Dashboard to find your content. You can use the list sorting columns to arrange the content. You can also type the name of your content in the search field to show just content with that search term in the list.
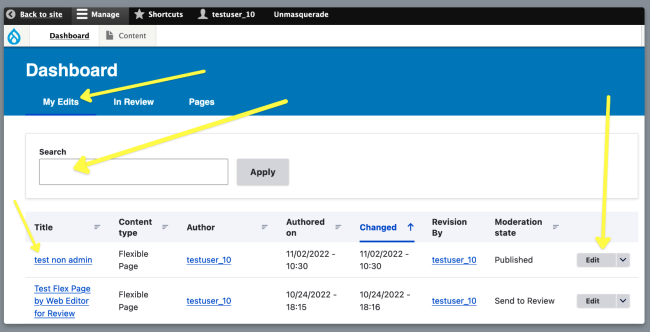
Step 3: To Edit the content, select either the title of the content (in blue) OR select the "Edit" button on the far right column.
How to choose between a Program Page or a Flex Page
PROGRAM PAGE
If you are looking to create or manage Undergraduate or Graduate majors, minors or programs you will be selecting the Program Page as your page type. By adding your page as a Program Page content type your page will automatically be included in the Program Finder.
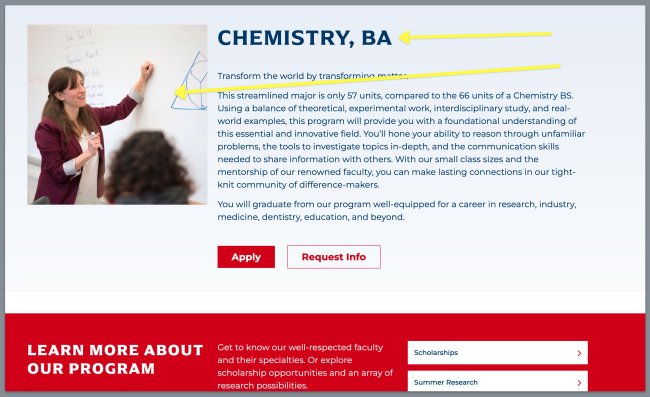
Example of a Program Page content type:
Key Characteristics of a Program Page:
Two (2) column layout at the top of the page. Left column includes a square image. Right column includes the title of page directly above the introductory paragraph.
FLEX PAGE
If you are creating a page that is not a major, minor or program, you will want to use a Flex Page. Common examples of these are Department pages and/or other pages dedicated to providing useful information and are not a major or a minor.
Example of a Flex Page content type:
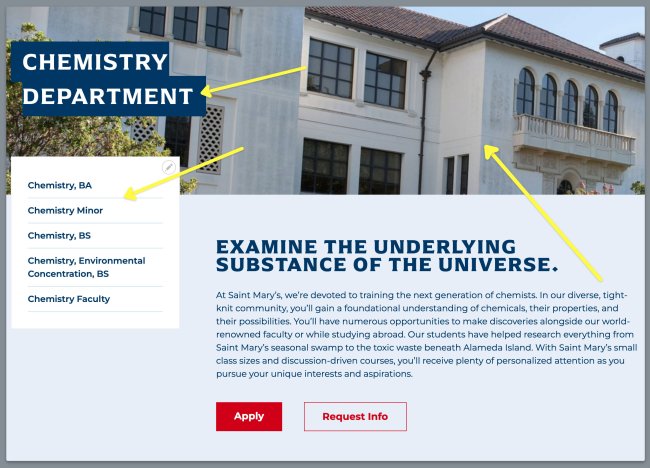
Key Characteristics of a Flex Page:
Full width "Hero" image at the top with page title placed above image in top left corner. Then a two (2) column layout below the "Hero" image. Left column includes an editable menu to navigate collection of pages in that section. Right column includes the introductory paragraph with bold, all caps header statement above.
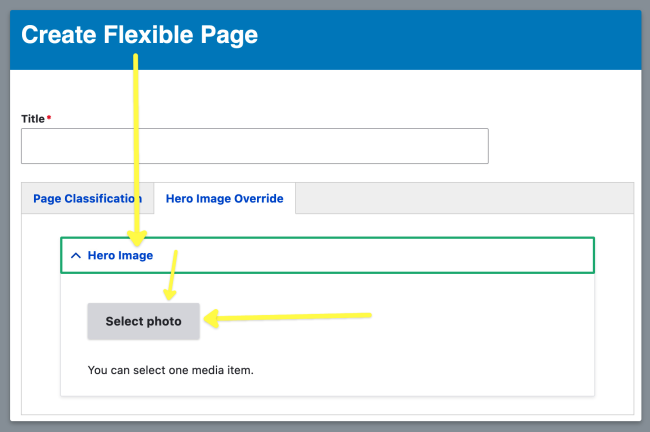
Step 1: Add a "Hero" Image by selecting the Hero Image drop down and Select Photos.
Note: Ideal image dimensions are 1600px wide or less for the "Hero" image type.

Note: For Flex Page type, go to the Hero Image Override tab at the top, just below the Title input field
Step 2: Select an existing photo by clicking on one and pressing the blue "Select photo" button. Or Upload new photo.
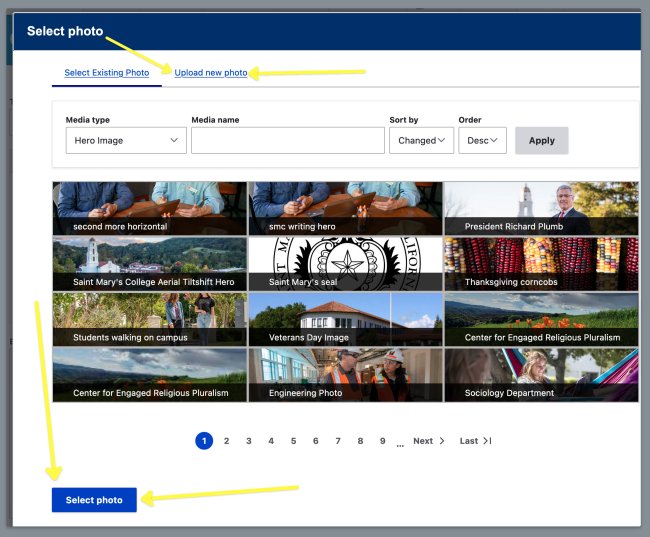
Step 3: If you're uploading a new photo, select Browse and choose a photo from your computer.
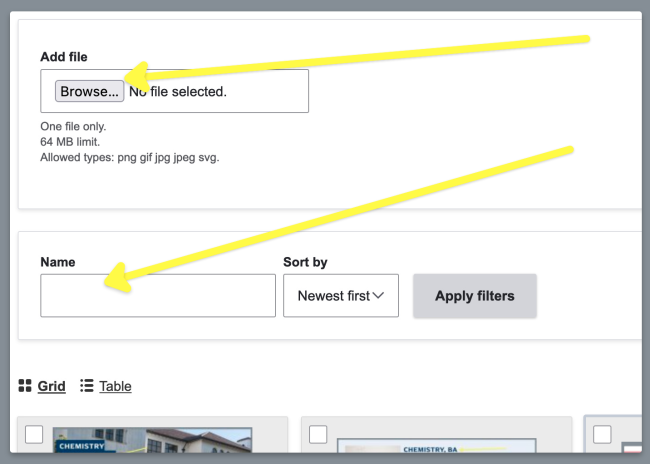
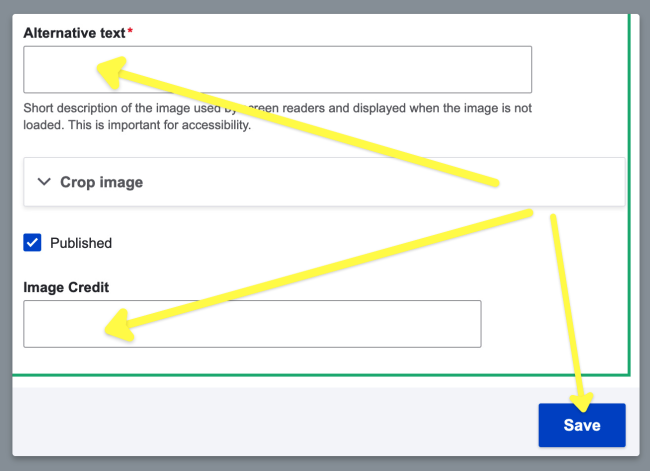
Step 4: Add the required alt text to help screen readers understand what the image depicts. Then select the blue "Save" button.
Step 5: Your image should now have a blue check box next to it, select the blue button "Insert selected."

DONE! Congrats, you have successfully added an image.
ADDING IMAGES TO THE WYSIWYG EDITOR
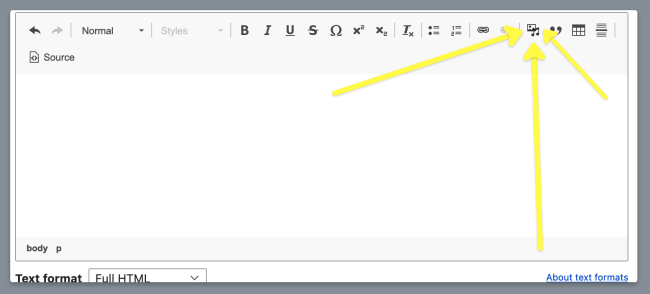
You can also add images to the WYSIWYG editor by selecting the image icon above the body text input field.
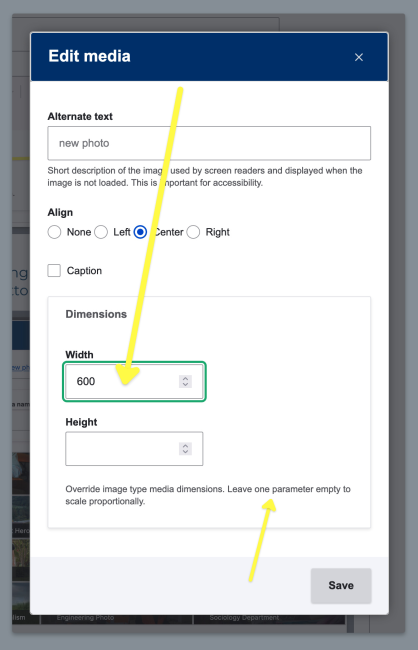
Is your image appearing too large on the page? Resize the photo by adding a dimension (width or height).
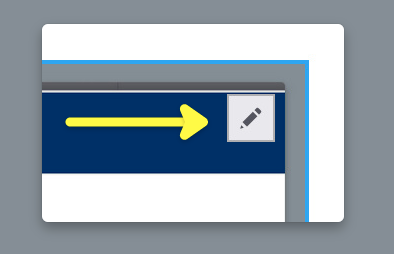
Step 1: Edit the photo by using the pencil icon that appears in the top right hand side of the image.
Step 2: Add a dimension, in this case only add a width so the image does not become distorted/maintains it's aspect ratio. Then Save.
NEED MORE CONTROL?
Resize your image for free using Adobe Express Image Editor: https://www.adobe.com/express/feature/image/resize?
Both Flex and Program Pages require you to add a classification, also known as a taxonomy.
Flex Page: Use the drop down to add Page Classification to Flex Page. As you select your "Parent" classification, the "Child" or dependent sub class will auto-populate a new drop down field where you can continue to add your classification sequence.
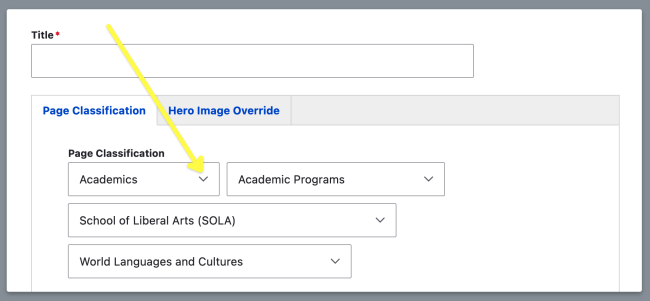
Program Page: The process is the same as a Flex page however you must first select the tab below the Title called "Page Classification."
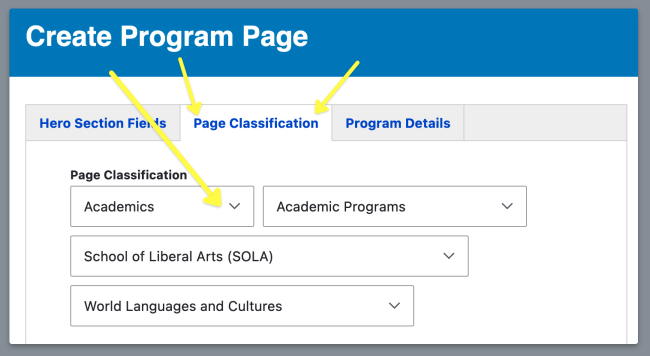
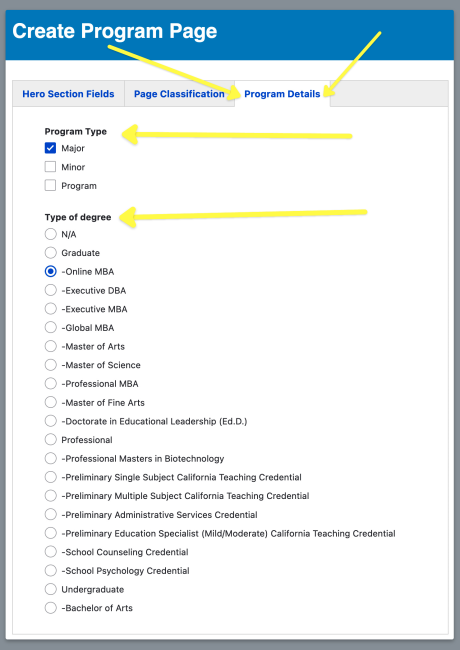
NOTE: Program pages also request that you identify the Program Details (major, minor, graduate etc.), which can be defined under the third tab labeled "Program Details."
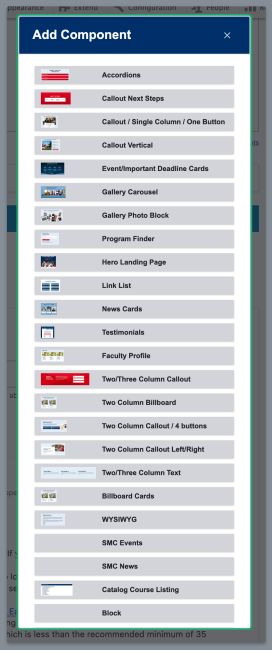
Before you select a component, use this handy visual guide to see which component is right for your use case.
Adding a Component
Step 1: Select the blue Add Component button

Step 2: Select which component you want to add from the list.
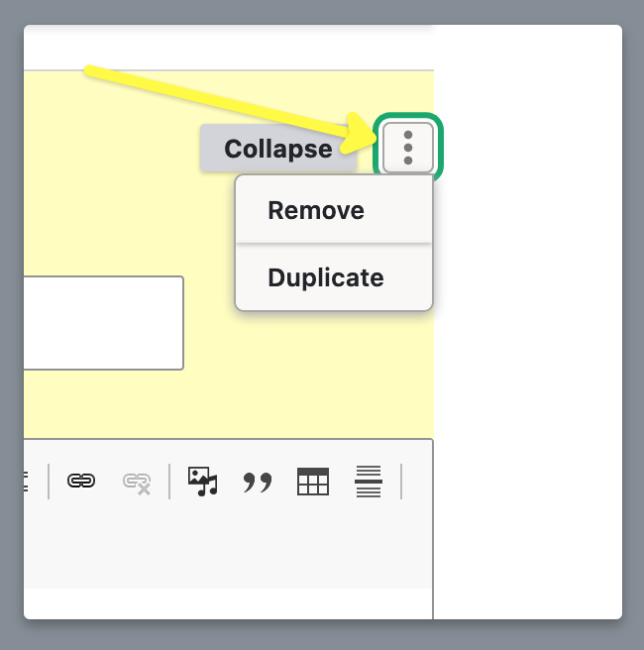
Remove a Component: Use the box with the 3 dots on the top right of each Component to see a drop down with options to Remove or Duplicate.
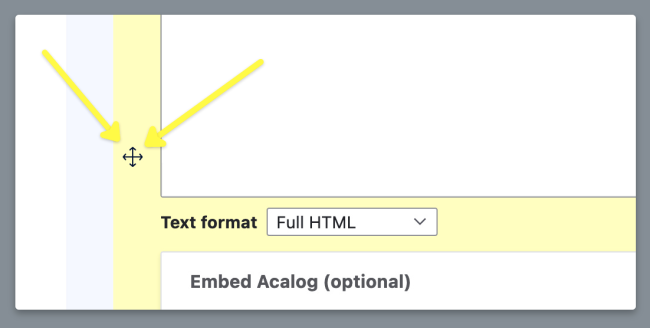
Reorder a Component: To reorder Components, or elements within Components, use the handy directional arrows icon located along the left column of the page.
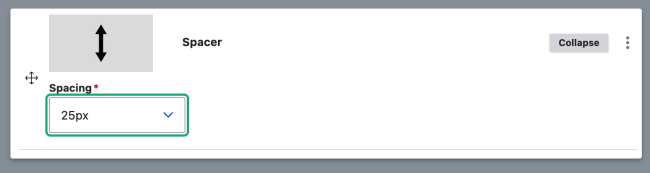
NOTE: You can use the "Spacer" Component at the very bottom of the list to add additional padding between each component.
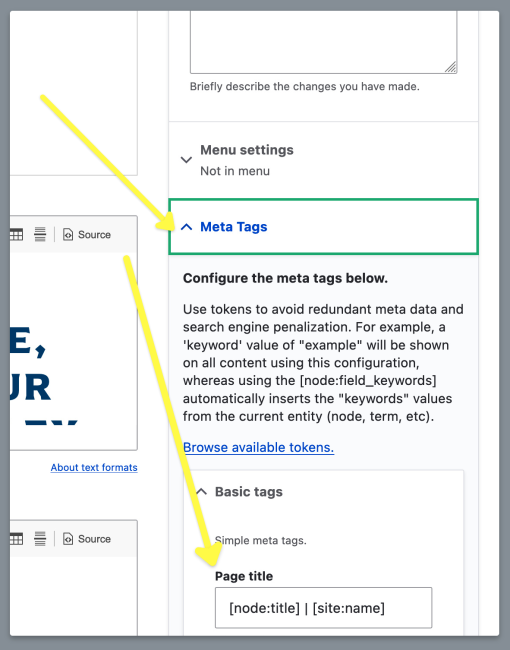
Metadata is important for search engines to find your content. A majority of the critical metadata fields are completed programmatically and you therefore are not required to enter this information in order to publish a page.
However, if you would like to have more control over these fields you can select the right column section titled Meta Tags to reveal all the many available and editable fields to fine tune/help with discoverability of your page.
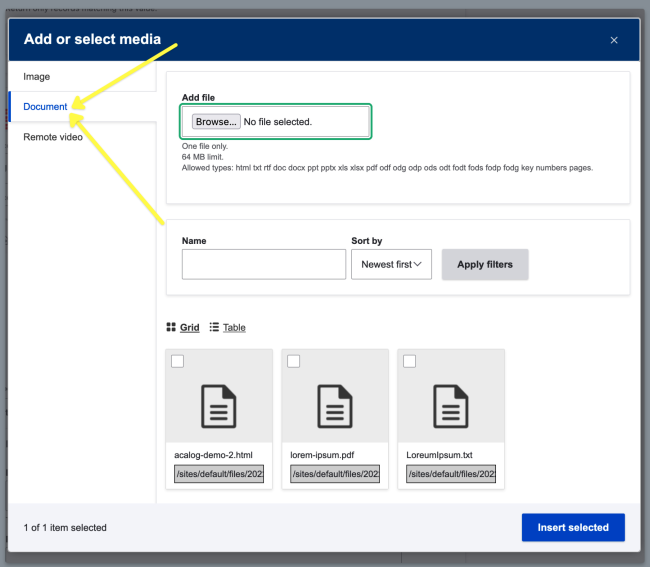
Adding a file or document is exactly the same process as adding an image discussed above except that in the initial Add or Select Media pop up window you will select "Document" tab in the top left. Here you can either upload or select an existing file much like you would when selecting an image.
When all of the required fields and desired components are added to the page you can Preview your page using the button at the bottom of the form.
Save a Page (as a Draft, for Review or to Publish)
If you are ready to Save your work, either for Review or to be published, you can use the drop down to select "Save as" Unpublished, Draft, Send to Review or Published.
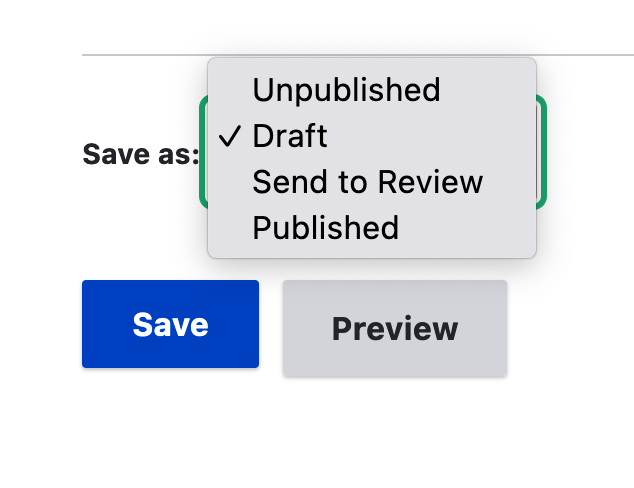
NOTE: What you see in this drop down will depend on your user role.
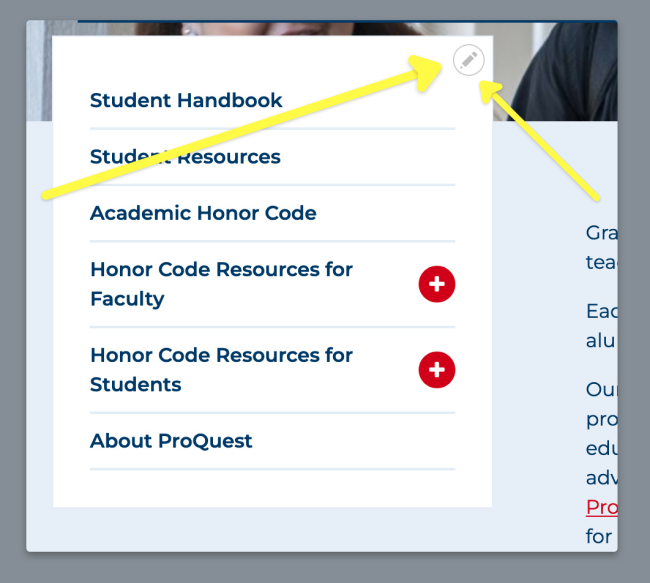
NOTE: You must be logged in to edit the left side sub menu.
Step 1: Go to the published flex page type you want to edit.
Step 2: Select the pencil icon that appears on the top right of the menu to be taken to the Edit Menu page.
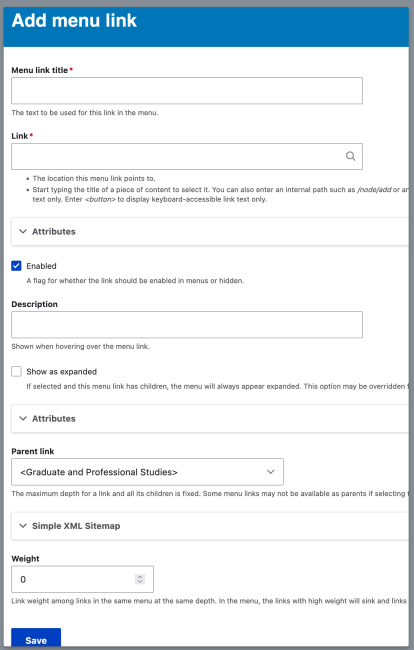
Step 3: Select the Add Link blue button at the very top left of the page.
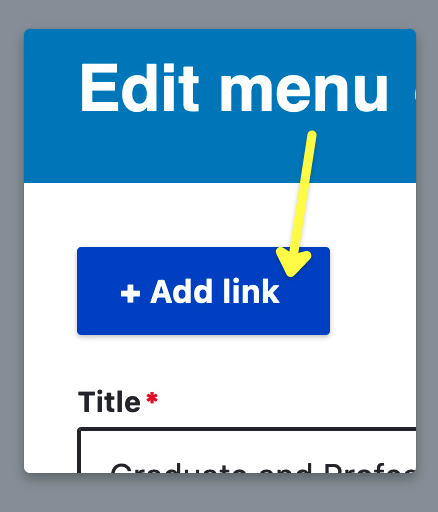
Step 4: Add your link details (title, link) for your new menu item, then select Save when all required fields are entered.
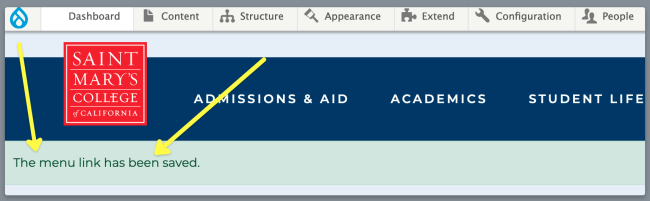
Step 5: You will see a green alert message at the top of the page indicating that your new link was saved. You will also see your new link included in the list of items in the left menu at the very bottom.
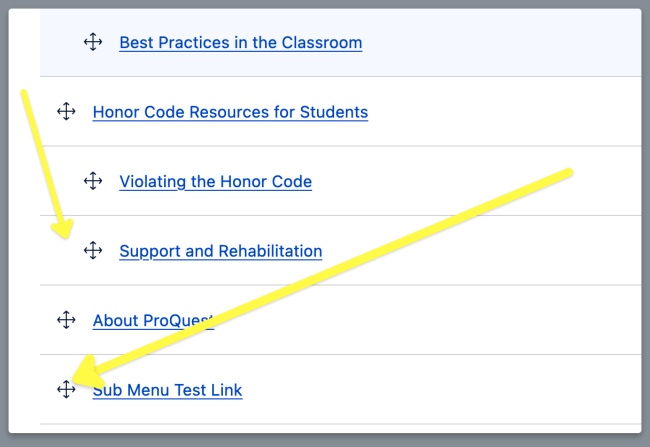
Step 6: To update the order/reorder your new link in the left menu, select the pencil icon again to be taken to the Edit Menu page.
Step 7: On the Edit Menu page, scroll to the bottom and drag and drop your new menu item in whichever order you would like it to appear.
NOTE: You can also drag and drop links slightly to the right of an item to make it a child/sub item, creating a second drop down menu inside the sub menu, accessible by clicking the "+" icon.
Step 8: Save, and view your new menu!