How To: Build A News Story

How to use the new SMC Website to Create, Publish and Manage your News Story
We will cover a few ways to begin creating your news story.
Step 1: Log in.
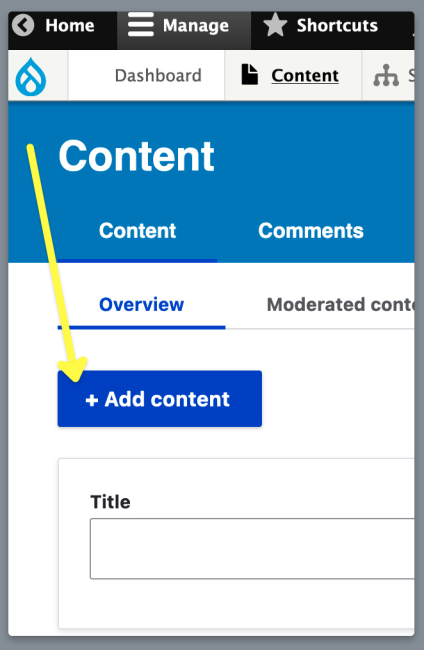
Step 2: In the top left panel, hover over over "Content" > "Add Content" and select "News Story."
Note: Alternatively, you can select "Content" and on the Content page select the blue "+ Add Content" button.
Tip: Save the "add news story" url as a bookmark to easily jump in to creating a news story.
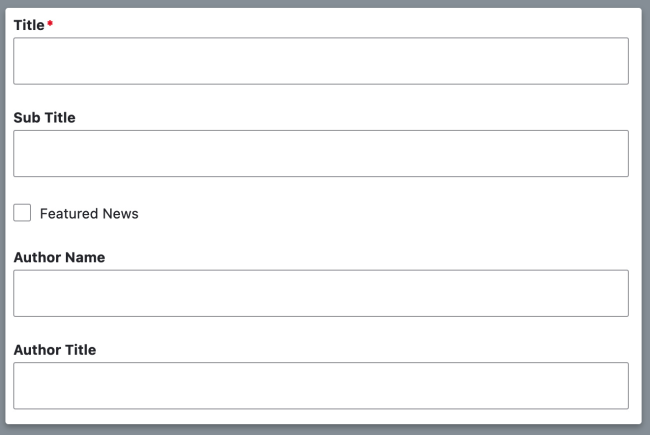
Step 3: Add your desired Title, Sub Title, Author Name and Author Title
Note: Select the "Featured News" checkbox if you want your story to be included in the Featured News Story component on your pages.
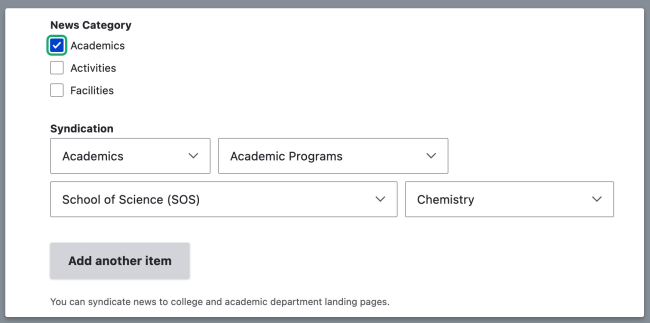
Step 4: Check the News Type/Category where you would like your story to be found in the main News area.
Step 5: Select the department or program you would like your story to be assigned to. In this example we have set our story to be syndicated to appear only in the Chemistry department pages.
Note: If you want to include additional areas for your story to appear, simply select the "Add another item" button to add another area to Syndicate to.
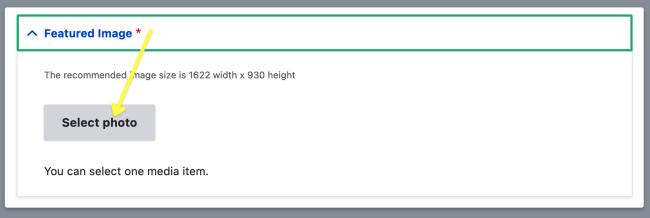
Step 6: Select the Featured Image drop down, then select "Select Photo." to upload your main image.
Note: Find out more about uploading images and sizing images on the How To: Build A Web Page section.
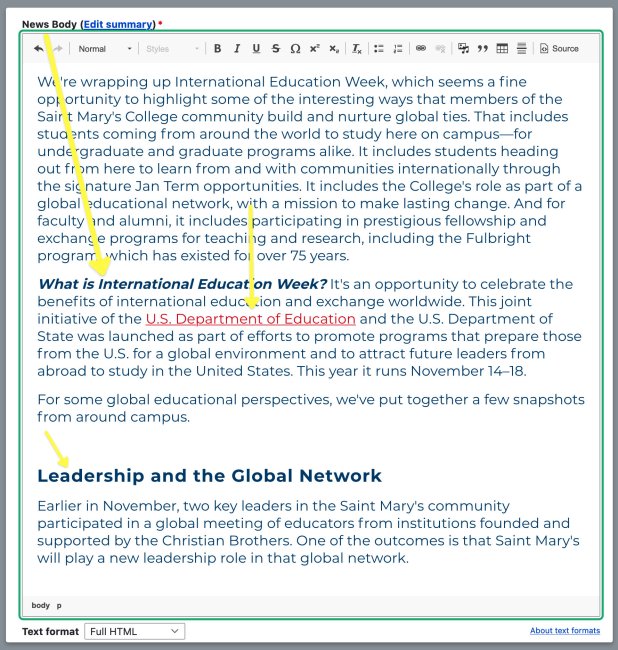
Step 1: Write or copy and paste your story text to the News Body WYSIWYG.
Pro Tip: Instead of writing within the News Body field, first create your story without images using a common word editor like google sheets or similar free tool and then copy and paste your styled and spelling-error-free text into the WYSIWYG News Body field.
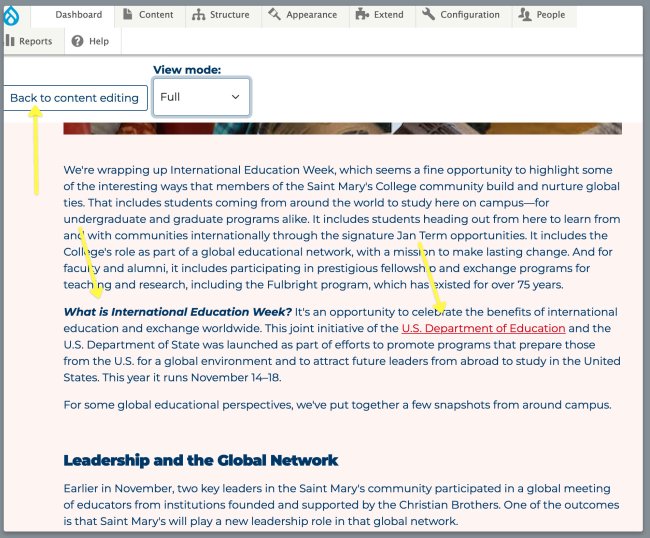
Step 2: Select the Preview button at the bottom of the page to see how your text will look on the published page, note any changes that might need to be made and select the "Back to content editing" button on the top left.
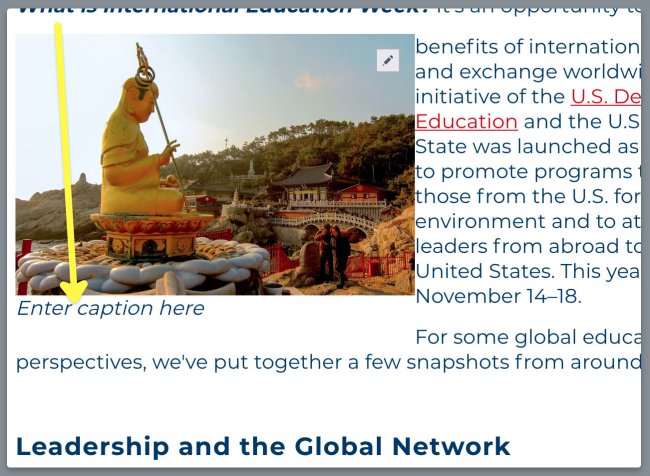
Step 3: Add images, set dimensions and alignment (left, center, right) and select the "caption" check box to show a caption. You'll add the caption text on the next screen. Now select "Save."
Pro Tip: It's recommended you use this Caption checkbox feature and not the Photo Credit field when first adding your image to avoid conflicts and visual inconsistencies.
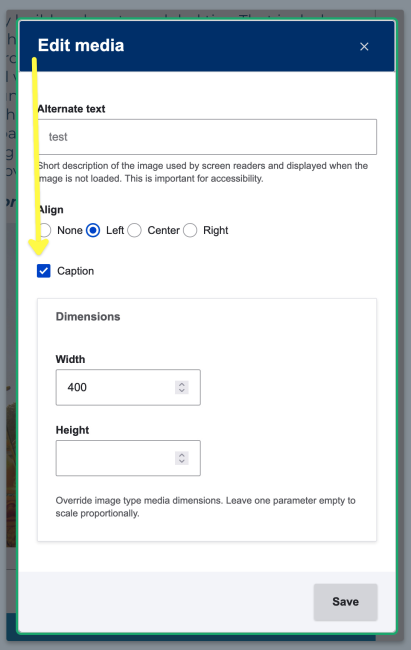
Step 4: Enter the text for your caption underneath your photo.
Step 5: Repeat steps 3 and 4 for each image you want to include in your text.
Recommended Final Step: Use the Preview button again to view how your images and text will look on the published page.
Add Image Gallery (optional)
Now that your content has been added you are ready to add an Image Gallery. Simply select the blue "Add Component" button to see the available components.
SEO Optimizations
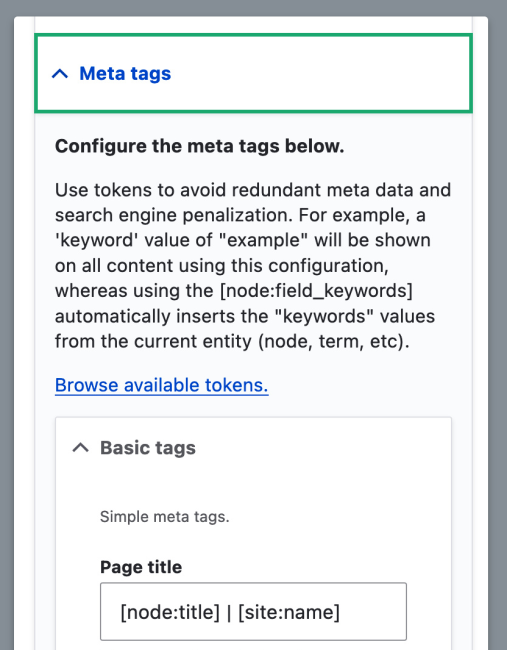
As previously covered under How to Build a Web Page, you can use the Focus keyword input field at the bottom of the page as well as the Meta Tags field in the top right column to add/edit SEO details.
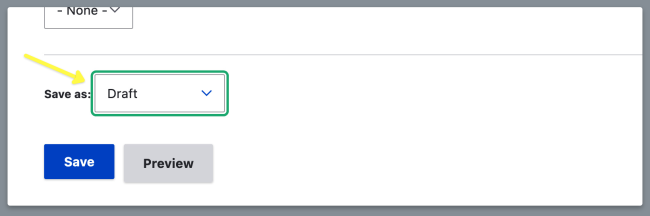
Publish Your Story
Now you're ready to Publish! Select the "Save as" drop down and choose Publish, then select the blue "Save" button. Your story is now live!