Watershed Explorer Curriculum

Watershed Explorer Curriculum
Incorporates language skills, art, science, history, and culture into activities and exercises for kindergarten through high-school students. Select activities from the Watershed Explorer Curriculum are available here on our website. See links below!
The first step in understanding watersheds is to explore your own local watershed. Everyone lives within one.
Introduction
This adapted activity, taken from the Watershed Explorer Curriculum, is a good way to introduce students to the importance of watersheds, and can be followed up with the Watershed In Your Hand activity to increase engagement.
Scroll to the bottom of this page to see a video demonstration of this activity!
What is a Watershed?
You might have noticed that we at River of Words talk a lot about watersheds — getting to know them, observing them, and conserving them. But what exactly is a watershed? A watershed is land that drains into the same body of water. Not only are all the landscape features, like hills, ridges, mountains, and plains, part of a watershed, but every living thing in a watershed is an important part of it, too!
Well, now that we know what a watershed is, why are they so important? No matter where you are in the world, the water in the area — whether it’s a creek, a river, or rain — has to drain somewhere. This means whether you live in the middle of a city or way out in a rural town, you’re also part of a watershed. And watersheds connect to each other; this means they all depend on each other to maintain the health of the overall ecosystem. Even a small problem in one watershed may drastically affect how other watersheds downstream function.
Okay, so what do we do to protect watersheds? Good question! First and foremost, it’s important to get to know the environment you live in so you can help preserve it.
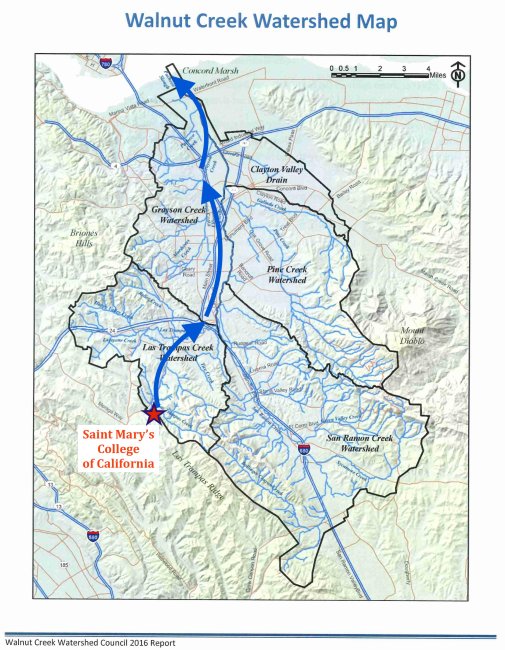
Today we’re going to be getting to know the watershed your school is in. Because River of Words is located in Saint Mary’s College of California, that’s the watershed we’re going to be looking at, but you can follow these steps to learn about your own.
Activity Instructions
For this activity, you will need a topographic map of your local area. For example, if we at River of Words were to do this activity, we would print out a section of Google Maps. Topographic maps show features like hills, valleys, and so on, which can be extremely helpful for this activity. You can find these online or at your local library.
-
Trace the high points that separate our nearest creek or river from the next. I’m doing this in red, but you can use any color you like as long as you remember what it means.
- Map out how the land in your area is being used. You'll notice that Google Maps uses green to indicate all sorts of land not used for commercial, residential, or industrial purposes. For example, parks, forests, and nature preserves are all indicated in green. What does it mean if an area on Google Maps is mostly or completely gray?
- Remember how we mentioned rain earlier? Now, list as many places as you can think of as to where rain goes in your watershed. For example, in St. Mary’s, the rain goes into storm drains, which drains into creeks, and those creeks drain into rivers that go out into the ocean. (If you don’t know what rivers might be in your area, now is a great time to check out that topographic map, or seek out a regular map if you prefer).
- Think about the rain that falls onto the roof of your school building. Where does that rain go? Can any of it get to a river or stream? If so, how? If you can, pause this video, go outside, and look around your school building! You may notice land features that you’ve never noticed before.
- Think about the ecosystem. Are you ever anywhere that isn’t in a watershed? The answer, of course, is no: anywhere you encounter water, whether through the rain, a river, or underground wellspring, you're in a watershed.
- What’s going on with your watershed right now? Are there any recent articles about it online or in the newspaper? Do you have any issues with pollution or watershed mismanagement?
Congratulations — you're beginning to get to know your own watershed!
Learn how to create a miniature watershed model that demonstrates the basic geography of a watershed, how water flows through the system, and the impact people can have on the quality of our water.
Introduction
Recommended Grades: K-12
This adapted activity, taken from the Watershed Explorer Curriculum, is a good way to introduce students to the importance of watersheds. This activity is best paired with the Get To Know Your Watershed activity to increase engagement.
Scroll to the bottom of this page to see a step-by-step photographic demonstration of this activity!
Materials
You will need:
- A sheet of paper
- Three different colors of water soluble markers
- A spray bottle of water
Activity: What is a watershed?
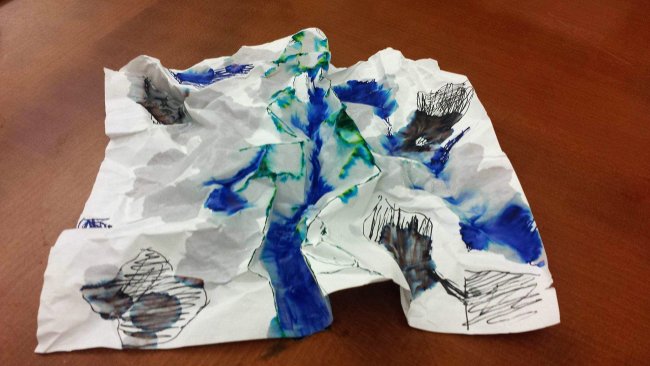
A watershed is a geographic area in which water, sediments, and dissolved minerals all drain into a common body of water like a stream, creek, reservoir, or bay. A watershed includes all the plants, animals, and people who live in it, as well as the non-living components like rocks and soil. We are all part of watershed, and everything we do can affect the surface and ground water that runs through this system. When you create your miniature watersheds, be sure to use water soluble makers — as the markers “bleed,” they demonstrate how rain moving through the watershed affects soil erosion and urban runoff.
Instructions
|
Image
|
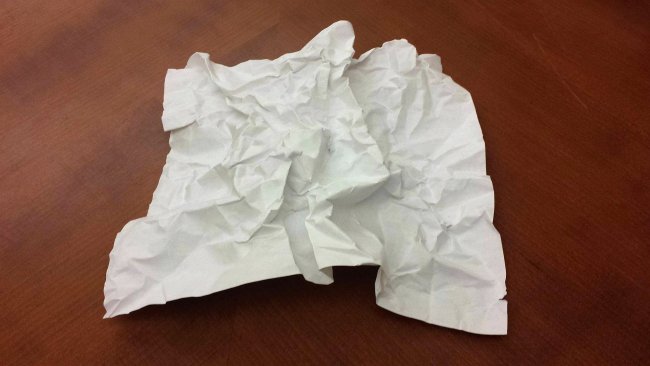
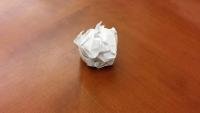
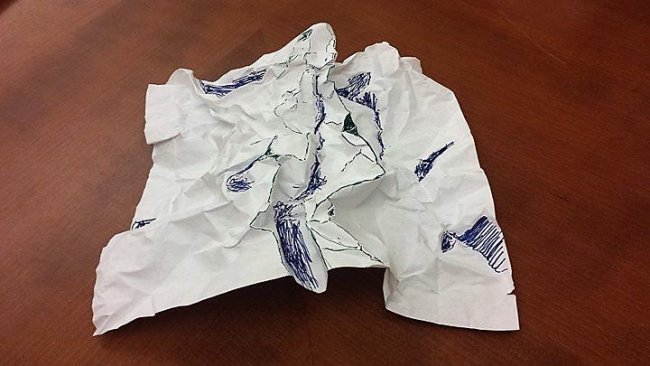
1. To create the watershed, crumple a piece of paper into a tight ball. Image
Gently open up the paper, but don’t flatten it out completely. The highest points on the paper will be mountain tops, and the lowest wrinkles will be valleys. |
|
Image
|
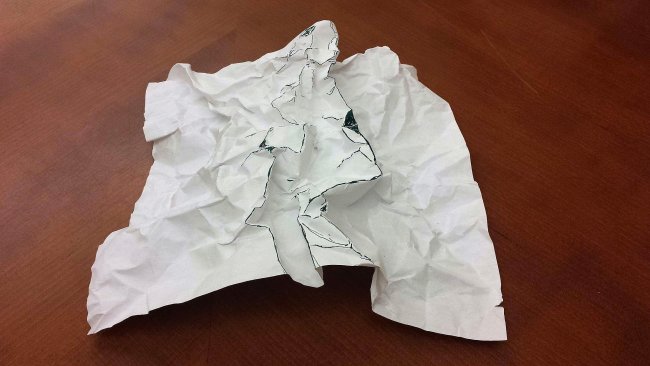
2. Choose one color of marker and use it to mark the highest points on the map. These points are the mountain ridge lines. |
|
Image
|
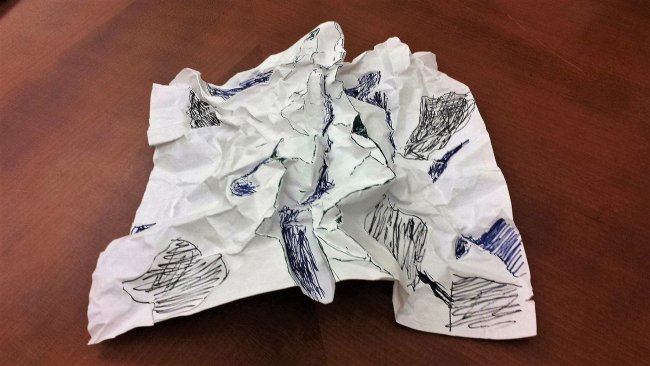
3. Choose a second color and mark the places where different bodies of water might be. Are there creeks? Lakes? Rivers? |
|
Image
|
4. With a third color, mark four to five places to represent human settlements. For example, houses, factories, shopping centers, office buildings, schools, etc. |
|
Image
|
5. Make rain fall into your watershed by spraying it with the spray bottles. Watch how the water travels through the system. |
What did you learn?
- What changes did you observe in the watershed?
- Where does most of the rain fall? What path does the water follow?
- Where does erosion occur?
- What happens to the human settlements - are there any buildings in the way of a raging river or crumbling hillside? How does the flow of water through the watershed affect you choice of building sites?
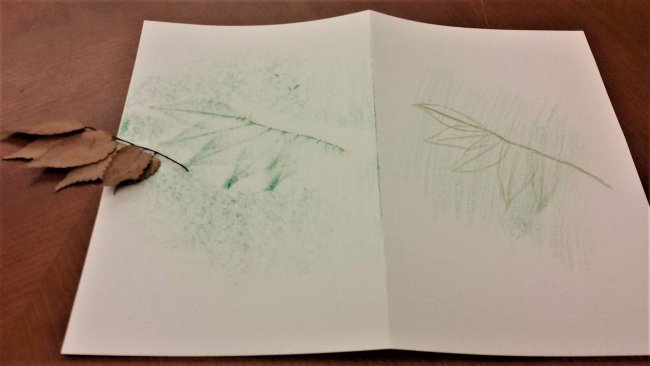
The world is full of a variety of textures. Learning how to sense textures in three-dimensional forms can help us learn how to represent textures two-dimensionally. In this fun activity, we’ll be investigating and describing our natural world by creating rubbings of different textures.
Recommended Grades: K-12
You will need:
- Items collected from nature (leaves, cactus, bark, rocks, etc.)
- Items with textures that are man-made (baskets, woodwork, metal grates, etc.)
- White art paper
- Crayons
Instructions
|
Image

|
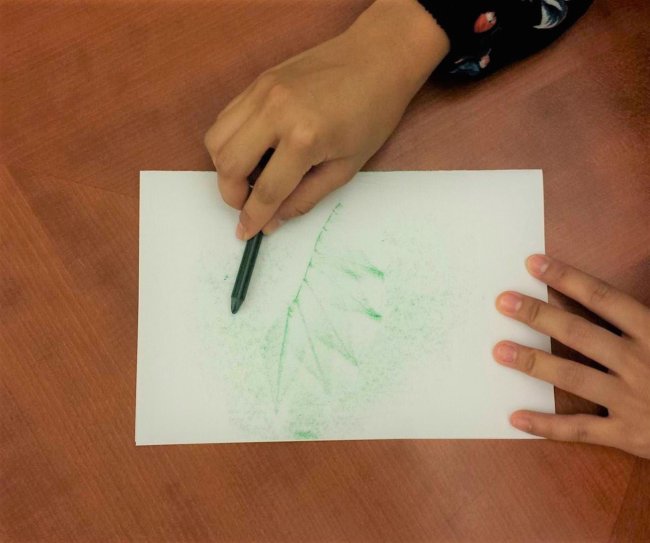
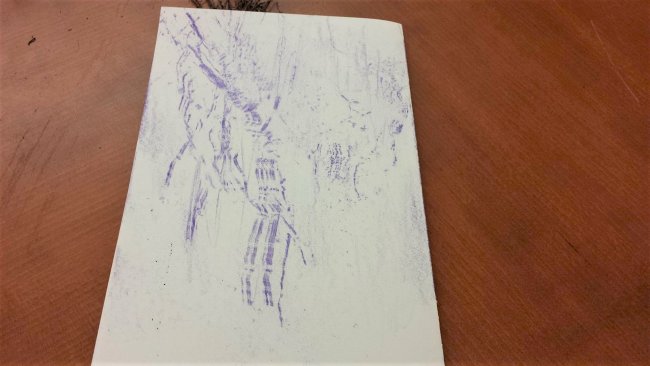
1. Start with one of your items. How can you describe the way it looks and feels? Is it soft? Hard? Prickly? Sticky? Bumpy? Sometimes it’s helpful to think in terms of antonyms — or opposites — when compiling the list. |
|
Image
|
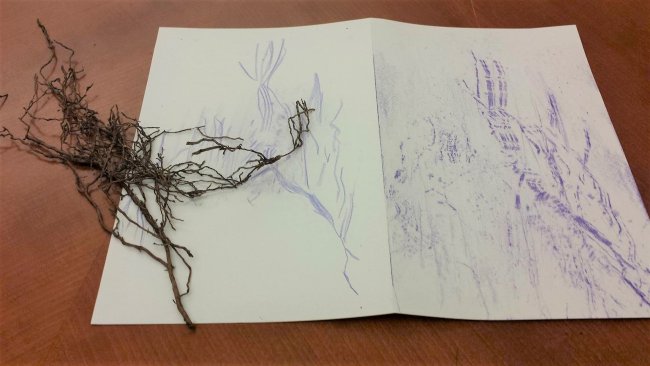
2. Fold your paper in half, and do a rubbing on one side. To do this, place the item underneath the paper, and colour the paper with crayon. |
|
Image
|
3. If you’re doing this with friends or family, can they guess what the texture of the item is just by the rubbing? Try it out! |
|
Image
|
4. If you’re making more than one rubbing, are you able to categorize them as man-made or natural? |
|
Image
|
5. On the other half of the paper, try to replicate the rubbing you have created. You may have to use different artistic techniques such as cross-hatching or stippling. Do certain techniques work best for different textures? |

This fun activity will help you discover the interconnectedness of ecosystems, as you use observation and imagination to think about a “mystery item” in the natural world.
Recommended Grades: 3-12
You will need:
- A mystery item
- A pen/pencil
- A notebook
- Art supplies
Instructions
- Ask your parents permission to go out into the world. You can even work together to explore your backyard, a local park, your city block, a creek, a shared public place, etc. Find an item that is unfamiliar to you or that sparks your curiosity. You don’t have to know what it is.
- Observe the mystery item. Look at it closely and touch it. You can also try to draw it.
- What kind of environment did the mystery item come from? What does it look like? What might it do in its ecosystem, and why? What do you want to call it? Write these observations down in your notebook.
- Try writing a story or poem about the mystery item!
- If you are doing this activity with friends, you might want to try explaining your mystery items to each other, comparing and contrasting your mystery items, and/or sharing the stories and poems you wrote!
- You might want to start a mystery item notebook, and practice doing this regularly. This is a fun way to start keeping your eyes open in nature!
Creating a kite is a fun way to connect with the environment!
You might be wondering, "but wait — what does kite flying have to do with poetry or learning about the environment?"
In addition to providing a fun and engaging way to experience the outdoors, we think that kite flying is an effective way to connect to the part of ourselves and the universe from which poetry and art flow. Many cultures have valued kite flying as a kind of meditation and a celebration of beauty, grace, nature, and art. “Catching the wind” has fascinated humans throughout history and led to many artistic and scientific achievements, not to mention hours of sheer delight and contentment. Check out the sections below for more information about all the ways humans have used kites as tools or entertainment to interact with the environment — including as the objects of science experiments and even methods of espionage!
Materials:
- Twine
- Glue or tape
- A sheet of strong paper, such as construction paper or art paper
- 1 stick (bamboo, skewers, dowel rods) 90 cm in length
- 1 stick (bamboo, skewers, dowel rods) 102 cm in length
- Scissors or an x-acto knife (be careful!)
- Optional: supplies to decorate your kite! Markers, crayons, colored pencils, glitter glue, etc
- Optional: Ribbon to make the kite tail
Instructions
- Make a cross with your two sticks; place your shorter stick horizontally across your longer stick. Be careful that both sides of the shorter stick are equal in length - the shorter stick is called your “cross-piece.”
- Tie those two sticks together with your string or twine. Make sure the sticks stay at right angles to each other. When you are done, a dab of glue will help ensure the joint you’ve just made stays strong. Congratulations: you’ve just made a kite frame!
- Cut a notch at each end of both sticks — make sure it’s deep enough for the type of string you’re using to fit into. Cut a piece of string long enough to stretch around the whole perimeter of your kite frame. Make a loop in the top notch and fasten it by wrapping the string around the stick. Stretch the string through the notch at one end of the cross-piece, and make another loop at the bottom. Stretch the string through the notch at the other end of the cross-piece. Finish by wrapping the string a few times around the top of the stick and cutting off what you don’t need. The string frame needs to be taut, but not so tight that it warps the sticks.
- Lay your sail material flat, and place the stick frame down on top of it. Cut around the stick frame, leaving about 2 or 3 cm for a margin. Fold those edges over the string frame; then, tape or glue the sail margins down so that the material is tight.
- Cut a piece of string about 122 cm long, and tie one end to the loop at the other end of the string to the loop at the bottom. Tie another small loop in the string just above the intersection of the two cross pieces. This is the kite’s bridle — the string that attaches to the flying line.
- Make a tail by tying a small ribbon roughly every 10 cm along the length of string. Attach the tail to the loop at the bottom of the kite.
- Cut a flying line about 10 meters in length. Attach it to the kite using a square knot.
- Decorate!
Kite Dos and Don'ts
DO'S
- Do be mindful of the ground around you! Watch out for uneven ground, holes, and other hazards like roads.
- Do watch out for people and animals while launching and landing your kite.
- Do ask for an adult’s help if your kite gets caught in a tree, on a roof, or anywhere else it may be difficult to retrieve. Sometimes, you simply won’t be able to get it back, and you’ll have to let your kite go - but you can always make a new one!
- Do wear gloves unless you’re using a very light line, to protect your hands.
- Do watch the weather! Some days it’s not safe to fly a kite.
DON’TS
- Don’t walk backwards. You may fall over or walk into an unsafe situation.
- Don’t fly your kite in wet or stormy weather; lightning loves a wet kite!
- Don’t fly near power lines or antennae. If a kite does get loose and tangle in them, call the power company or fire department for help.
- Don’t fly your kite near busy streets.
- Don’t fly your kite within 5 miles of airports!
- Don’t use metallic string or wire on your kite.
- Don’t fly your kite higher than 500 feet - it’s a violation of international law, and could interfere with air traffic!
Crafting Tips
Things to keep in mind while you make your kite:
- Cut away from you!
- Your pivot point — the place where the two sticks of the kite frame connect — should be slightly above the center of the longer stick.
- Spray can glue is great for patching up paper kites.
- A flexible tail helps improve stability.
- Make sure your kite is balanced when you finish — hold it up by the string and see if it lists to one side. If one side is heavier than the other, you can weight the less heavy side by adding paper to it.
- Remember: kites are different every time you make one, so you might need to make slight adjustments for each kite.
Kite History
The exact origin of kites is not known, though many believe that they were first flown in China over two thousand years ago. Others say that kites were first used by the people of the South Sea Islands, who used kites to fish by attaching bait to the end of the kite’s tail. Still yet another story explaining the origin of kites comes from Bali, where it is believed that the first kite was made from a feather plucked from the neck of a goose. Whatever the exact origin of kites, we are left with a rich heritage of wonderful stories, designs, and techniques for making and flying kites.
Traditionally, kites have been associated with good luck. In some cultures, cutting the line of a kite is believed to release bad luck or evil spirits along with the kite. In Thailand, the flying of kites was believed to bring good luck for the year’s crops, saving them from bad floods. In what is now New Zealand, the Maori people sent prayers up to the heavens attached to kites. In South America, the Incas used kites to send messages from one Andean peak to another. In China and Japan, kites have been used extensively in battle and espionage, and in Korea, kites were flown to announce the birth of a new child.
Kites have been cited as the forerunner of the modern airplane. They have contributed to science and technology. Benjamin Franklin, noted American scientist and statesman, studied lightning and thunder in the sky with the help of a kite and then invented the lightning rod.
Kites are still used by some fishermen to lay bait in the sea to attract fish, and by photographers to take pictures from a bird’s-eye view. Kites have been used to lift many measuring instruments into the sky, helping scientists to study the atmosphere and our weather patterns. Kites also contributed greatly to aviation studies, as many of the earliest experiments of human flight involved the use of kites.
Today, kites are found all around the world. Almost every country in the world has a kite of its own; the form of each is determined by the climate and geography of the country it comes from. They are used for spiritual purposes; they are flown in celebration; they are used in ceremonies; they are used for scientific and research purposes; and they are flown for fun. Kites, in all their various forms and uses, are a part of most cultures, giving them a rich history and future!
Fun Kite Facts
Kites have been used for centuries to conduct scientific experiments, particularly those involving weather and aerodynamics. Kite technology led to the invention of the airplane, the parachute, and the helicopter. It may have even contributed to the Allied victory in World War II. Sailors aboard the aircraft carrier USS Block used kites to practice shooting at moving targets and to pass important papers from ships to flying aircrafts.
Chinese generals used kites in warfare as early as 200 BCE. Han Hsin, a brilliant general, flew a kite above a town to determine how far his army would have to tunnel to get inside the fortified walls. Han ordered his men to build a kite and fly it directly over the Emperor’s palace. When the kite was in place, the string was marked. Then the kite was reeled in and the line unspooled and measured. Thus the general knew exactly how far to tunnel in order to reach the inside of the palace walls. His victory marked the beginning of the Han Dynasty, which ruled China for the next two hundred years.
Kites built to carry human beings are called “man-lifting kites,” and often look like large box kites with an attached apparatus to carry a passenger. The earliest record of kites that could carry a person come from China, during the reign of Emperor Wenxuan of Qi. In the late 19th and early 20th centuries, kites were used for lifting military observers to heights from which they could observe the location and size of enemy forces. During the American Civil War, kites were used extensively to spy on enemy troops.
In the fifteenth century, Leonardo da Vinci used a kite to discover how to span a river to help in bridge construction. Leonardo’s method was later used in the 1800s by Homan Walsh, a ten year old boy in New York State, in the construction of one of the world’s first suspension bridges. In 1749, Scottish scientist Alexander Wilson used several kites, attached in a row, to measure and compare air temperature at different altitudes. Benjamin Franklin used kites to pull boats, carriages, and sleds in experiments with traction and to experiment with electrical energy in the atmosphere.
Alexander Graham Bell, who invented the telephone, used kites to learn more about the weather. He also contributed to aviation by experimenting with kites to learn more about the possibility of enabling people to fly. Like Chinese and Japanese generals before him, he developed a kite that could raise a person up in the air. Graham developed what is called the tetrahedral cell. It has great strength and a light structure; many modern kites use this same tetrahedron form. In 1902, Gugliemo Marconi used a kite to help transmit the first trans-Atlantic wireless telegraph message.
Samuel Cody, known as “Buffalo Bill,” was a Texas inventor and showman, who became famous for his “Wild West Shows.” In his later years, he moved to England and used kites to tow a boat across the English Channel. Cody and his son, Leon, developed larger and larger kites and often competed against each other. Cody also designed observation kite systems for the Russians and the French. Many kite designs that were developed for the military and for scientific purposes can still be seen at kite festivals and competitions around the world today.
Kite fighting is a sport practiced in Thailand, India, and many other countries. In some competitions, the object is to catch the opponent’s kite and drag it across a pre-determined barrier; sometimes the game is to bring the other kite down to the ground. There are even kite competitions where fliers coat their kite strings with secret formulas of powdered glass (some are said to use crushed diamonds!) and try to cut their opponent's lines.
Kids can be activists too! Here is how you can make your voice heard in government.
Materials:
- Paper or a blank postcard
- Scissors
- Pens, pencils, and markers
STEP 1: FIND A BILL
Here is how to find a congressional bill that you can use to write to your congressperson.
-
Go to Congress.gov
-
Use key words like “environment” or “education” to find bills that suit your interest.
-
You can look at bills in both the House and the Senate as well as Resolutions, but when writing to your congressperson, it is always a good idea to stick with bills, not resolutions.
-
Once you’ve found a bill that interests you, you can click on it for a summary, information on who wrote the bill, and a tracker on its path to becoming a law. This can be particularly helpful with bills that have been sent to committee so you can google the committee members and send them a postcard on your feelings about the bill.
-
Have fun researching and writing! :)
Some other resources to look into for finding bills:
-
sen.ca.gov (California)
-
assembly.ca.gov (California)
-
leginfo.legislature.ca.gov (California)
STEP 2: FIND YOUR CONGRESSPERSON
Here are some steps to finding your Congressional representatives in both the House and Senate.
House of Representatives:
-
Go to House.gov (click here for the hyperlink)
-
Go to the top of your screen and type in your zip code to find your representative. You may need to add your street address if your zip code overlaps with multiple districts
-
Write down your Congressperson’s name and address so you can write to them. (pro tip: Always refer to them as Congressman or Congresswoman __________. For example: Congresswoman Matsui or Congressman Garamendi).
Senators:
-
Go to Senate.gov (click here for the hyperlink)
-
At the top, click “find your senators”
-
Scroll down to your state
-
Write down your Senator’s name and address so you can write to them. (Pro tip: While writing to them you can either address them as Senator Harris or The Honorable Kamala Harris).
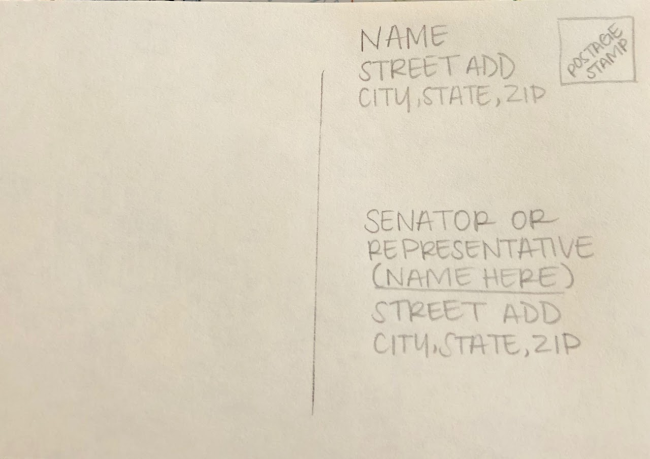
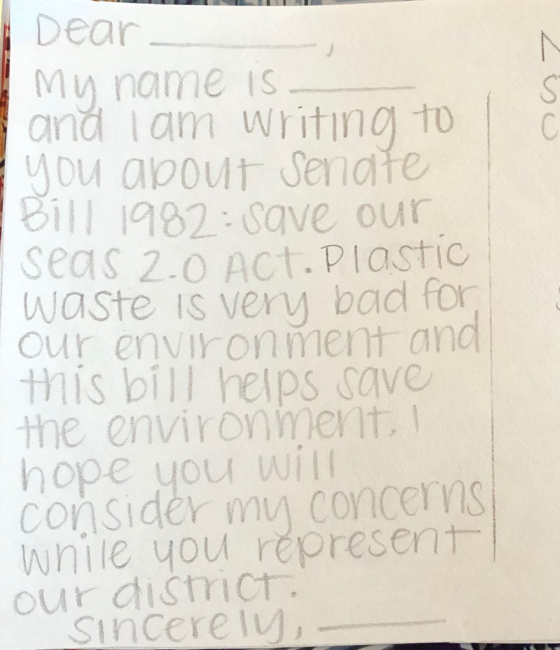
STEP 3: WRITE YOUR POSTCARD
Here are some steps to creating a postcard to send to your congressional representative! Our Congressional bill example:
S.1982: Save our Seas 2.0 Act
Sponsored by Senator Dan Sullivan [R-AK]
This bill addresses the plastic debris crisis that is threatening global economies and harming marine life. It seeks to reduce the creation of plastic waste, find homes for the plastic that already exists, and tackle the problem on a global scale.
|
Image

|
|
|
Image
|
2. Address the postcard to your congressperson using the above links to find your representative. Put your return address up top incase your congress person writes back to you |
|
Image
|
3. Write your letter to your Congressperson
|
|
Image
|
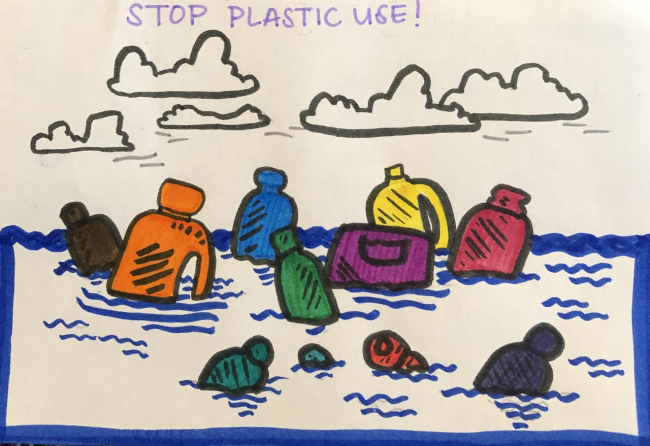
4. Draw a picture that is related to the bill and don't forget to add your stamp!
|
Fun and easy activity to explore your own backyard or neighborhood and think like a bird! Build your own nest out of natural and handy household items.
MATERIALS:
- Medium Sized Bowl
- Aluminum Foil
- Crafting Glue
- Natural Items (Leaves, twigs, moss, fuzz, hair, etc.)
|
Image

|
1. COLLECT MATERIALS For this project you will need: A small or medium sized bowl, aluminum foil, crafting glue, and some natural items, such as leave, twigs, hair or fuzz, etc. Be sure to ask for an adults help and have a designated crafting spot.
|
|
Image
|
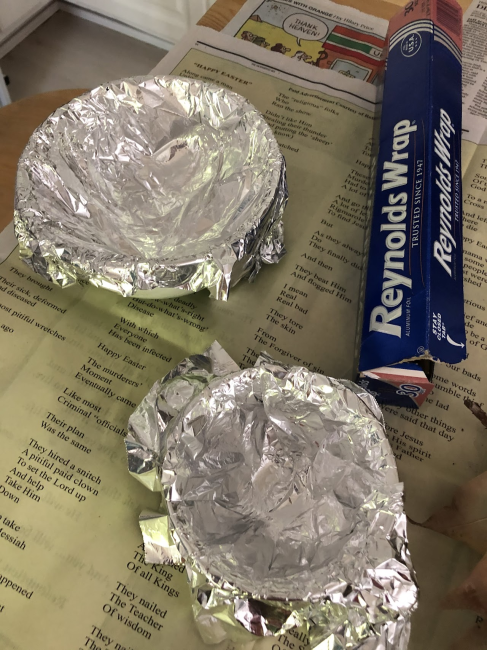
2. CREATE NEST SHAPE Shape the aluminum foil in the bowl to create a nest shape mold. |
|
Image
|
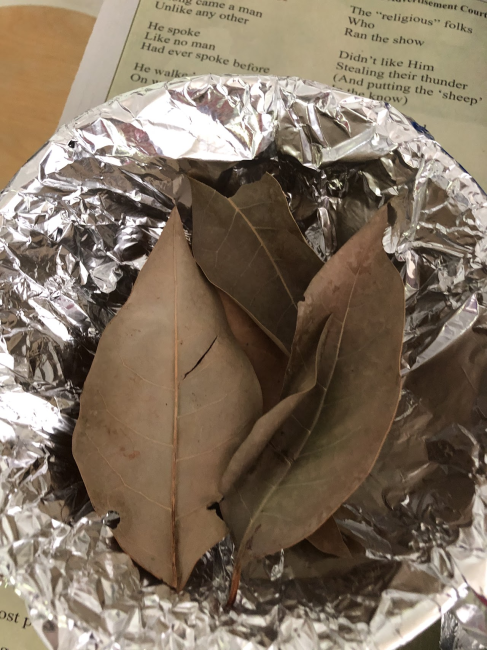
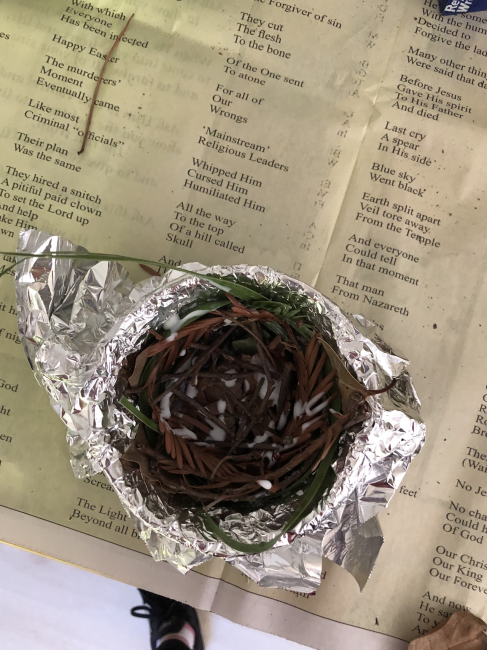
3. CREATE STRONG BASE Place larger items, such as flat leaves, in the bowl first to create a strong base for your nest. |
|
Image
|
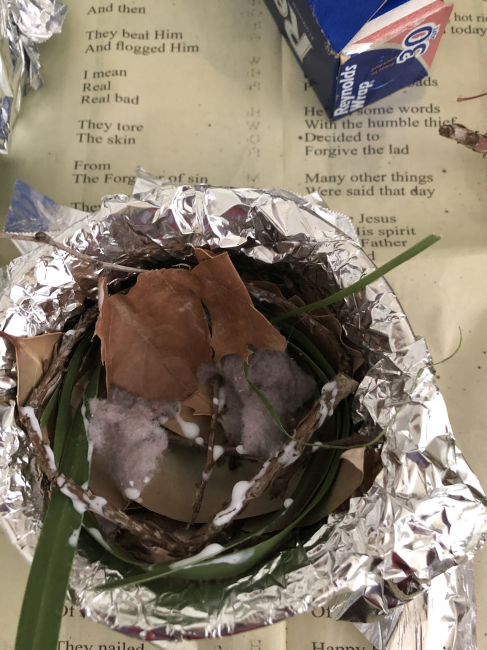
4. NEXT LAYER Begin to add more items into the bowl and drizzle some glue over the top to keep the pieces together. Be sure to keep space in the middle open for whoever lives inside this nest. |
|
Image
|
5. DRY Let the glue settle and dry for a bit. This will help your nest stay together. |
|
Image
|
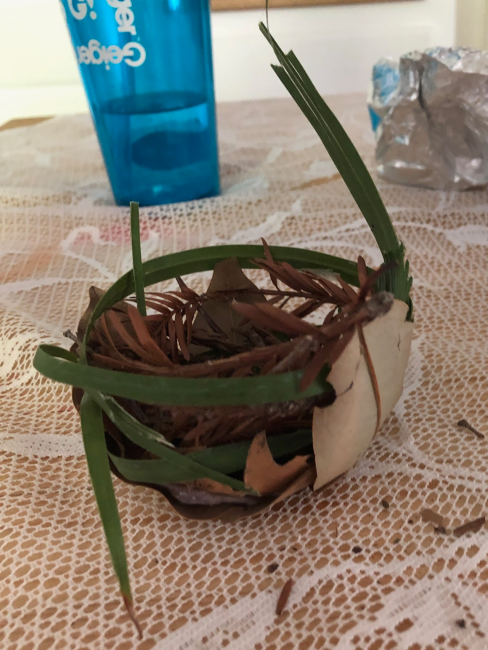
6. FINAL PRODUCT When your glue is all dry, carefully take your nest our of the bowl and remove the aluminum foil. And there you have a nest! Don't worry if it doesn't hold the first time. It might take a few times to get it just right. Practice makes perfect! |
Activity Extension to Middle/High School Students:
MATERIALS:
-
Internet Connection
Students can look up a local bird or animal in their area and find out its way of nesting and caring for their younglings. Students can research camouflage and distracting strategies animals use to protect their nests and explain any challenges humans create for these animals.
DISCLAIMER: Students should ask for permission from parent/guardian to go outside and collect materials. Adult supervision and assistance is required for lower elementary grades. Beware of thorns and plant material that may be harmful.